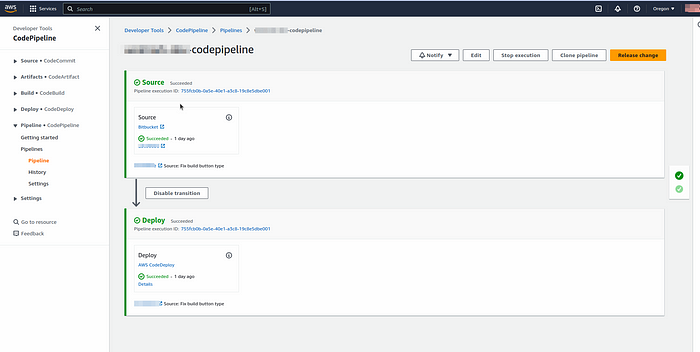
Automating AWS CodePipeline Setup with Terraform: Streamline Your CI/CD Workflow

Introduction:-
AWS #CodePipeline is a fully managed continuous delivery service that helps you automate your software release process. With CFV, an infrastructure-as-code tool, you can simplify the provisioning and configuration of #CodePipeline resources.
Prerequisites Before we begin, ensure you have the following prerequisites:
- An AWS account with appropriate permissions to create #CodePipeline resources.
- #Terraform installed on your local machine.
- AWS CLI configured with your AWS credentials.
Step-1 :- create a folder named code-pipeline in your home directory.
Step-2 :- Setting Up Your #Terraform Configuration Files Create three files: main.tf , variable.tf , and output.tf in your code-pipeline folder. Open your preferred text editor and create these files.
Step -3 :- Writing the #Terraform Code Now, let’s dive into the main.tf file and start writing our #Terraform code. In this file, we'll configure the AWS provider and define the #CodePipeline resources required for our deployment. Here's an example of how you can define the #CodePipeline:
provider "aws" {
  region = "us-east-1"  # Replace with your desired AWS region
}

resource "aws_codepipeline" "my_pipeline" {
  name     = var.pipeline_name
  role_arn = "arn:aws:iam::123456789012:role/CodePipelineServiceRole"  # Replace with your pipeline service role ARN

  artifact_store {
    location = "my-pipeline-artifacts"  # Replace with your desired S3 bucket name
    type     = "S3"
  }

  stage {
    name = "Source"

    action {
      name             = "SourceAction"
      category         = "Source"
      owner            = "AWS"
      provider         = "CodeCommit"
      version          = "1"
      output_artifacts = ["SourceArtifact"]

      configuration {
        RepositoryName = var.source_repository
      }
    }
  }

  stage {
    name = "Build"

    action {
      name            = "BuildAction"
      category        = "Build"
      owner           = "AWS"
      provider        = "CodeBuild"
      input_artifacts = ["SourceArtifact"]
      version         = "1"

      configuration {
        ProjectName    = "my-codebuild-project"  # Replace with your CodeBuild project name
        EnvironmentVariables = [
          {
            name  = "BUILD_SPEC"
            value = var.buildspec_file
          }
        ]
      }
    }
  }

  # Add additional stages and actions as needed
}

# Add any additional resources as needed
Step-4 :- Defining Input Variables In the variable.tf file, define the input variables needed for your #CodePipeline deployment. These variables will allow you to customize your pipeline based on your project's requirements. Here's an example of how you can define some essential variables:
variable "pipeline_name" {
  description = "Name of the CodePipeline"
  type        = string
}

variable "source_repository" {
  description = "URL of the source code repository"
  type        = string
}

variable "buildspec_file" {
  description = "File path to the buildspec file"
  type        = string
}

# Add any additional variables as needed
Step-5 :- Defining Outputs In the output.tf file, define the outputs you want to retrieve after deploying the #CodePipeline resources. These outputs can include information such as the #CodePipeline ARN, S3 bucket name for artifacts, or any other relevant details.
output "pipeline_arn" {
  value = aws_codepipeline.my_pipeline.arn
}

output "artifact_bucket" {
  value = aws_codepipeline.my_pipeline.artifact_store[0].location
}

# Add any additional outputs as needed
Step-6 :- Deploying #CodePipeline Resources Now that we have defined our #Terraform code, it’s time to deploy our #CodePipeline resources. Follow these steps:
- Open a terminal or command prompt and navigate to the directory where your #Terraform files are located.
- Run the following command to initialize the #Terraform configuration:
terraform initThis command downloads the necessary provider plugins and sets up the backend for storing the #Terraform state.
- Next, run the command to validate the #Terraform configuration:
terraform validateThis command ensures that the syntax and structure of your #Terraform code are correct.
- Run the following command to see the execution plan and confirm the resources that #Terraform will create:
terrafom planReview the plan to ensure that it aligns with your expectations. It will show you the changes that #Terraform will make to create or modify resources.
- If the plan looks good, proceed to apply the changes by running the following command:
terraform applyYou will be prompted to confirm the deployment. Type “yes” and press Enter to proceed.
- #Terraform will now create the #CodePipeline resources based on your configuration. This process may take a few moments. Once completed, you will see the outputs defined in the output.tf file, such as the pipeline ARN and artifact bucket name.
Congratulations! You have successfully deployed #CodePipeline resources using #Terraform.

Step 7: Cleaning Up (Optional) If you want to remove the deployed #CodePipeline resources and destroy the infrastructure, follow these steps:
- In the same terminal or command prompt, run the following command:
terraform destroyYou will be prompted to confirm the destruction of the resources. Type “yes” and press Enter to proceed.
- #Terraform will destroy the #CodePipeline resources and any other resources defined in your #Terraform configuration.
Conclusion:-
In this guide, we learned how to deploy #CodePipeline resources using #Terraform. By following the step-by-step instructions, you gained the ability to automate your software delivery pipeline and maintain consistency in your deployments. #Terraform’s infrastructure-as-code approach allows for version-controlled, repeatable deployments, making it a powerful tool for managing your AWS infrastructure.
